
No Knead Bread is a fool proof way to start off your bread baking adventure! It’s easy, straightforward and plain delicious! This No Knead Bread Recipe is my go to recipe for homemade bread has a video too!
Since there’s quite a lot to cover here, especially if you’re new to bread baking..Let’s get started!
NO KNEAD BREAD
The idea of a no knead bread is simply to skip the kneading and working of the dough into a smooth elastic ball. Instead all you do is blend ingredients with a spatula or spoon.
What is the Difference Between Knead and No Knead Bread?
Kneading the bread is the trick bakers use to create a chewy bread texture, however you can achieve that texture and more complex flavor to your bread without kneading. The trick is to allow the bread to ferment for longer time.
So no knead bread while much easier and fool proof, does however require planning ahead of time.
Ideally and even for this recipe, I prefer starting the night before. So right before you go to bed, fix yourself with a pre-ferment in 1 minute and next day, start the dough and baking later on.
The magical question I hear a lot is:
What Happens If I Knead no Knead Bread?
And the truth is-nothing much! You may feel tempted to work the dough a bit and smoothen it out if you’re an experienced baker and never tried no knead bread before.
Is no Knead Bread Dense?
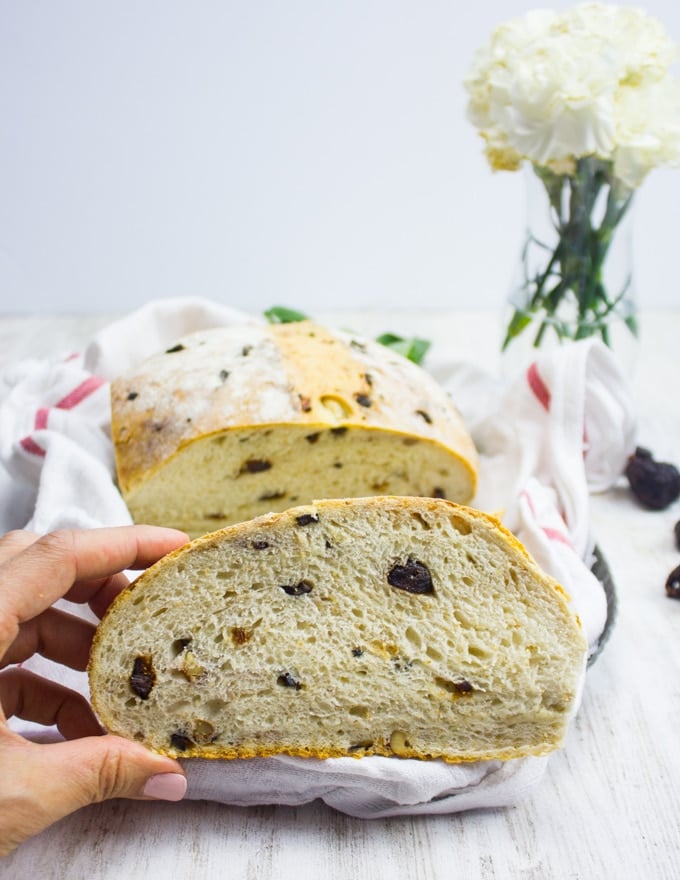
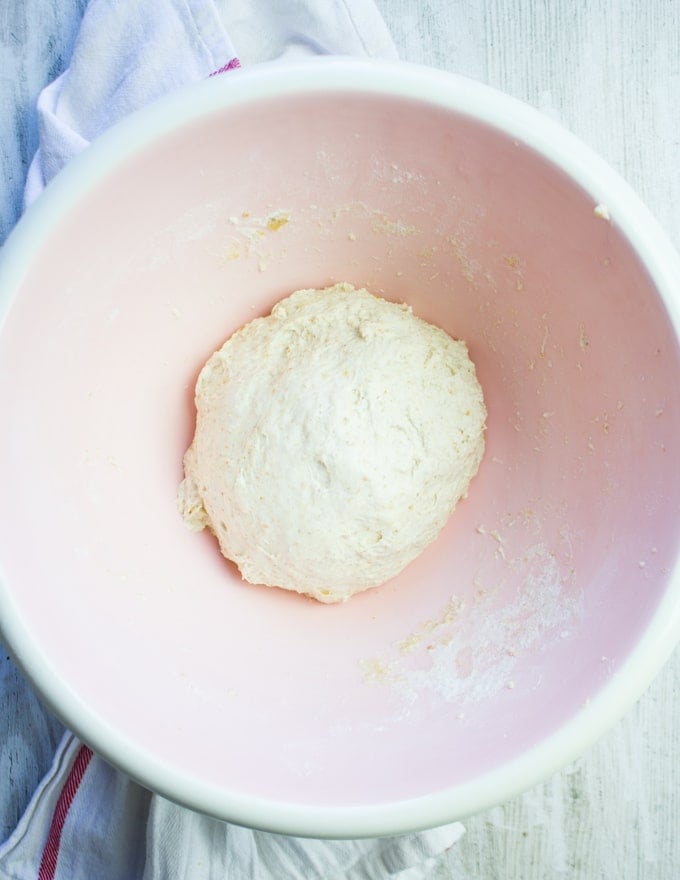
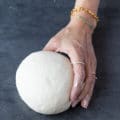
Absolutely NOT! Since the dough is not kneaded here, it’s preferable to have your dough “sticky”. And that’s achievable because you don’t have to be working it into a smooth ball. Sticky dough means it has more moisture, and hence as it bakes, it will have an airy texture.
How many Times does No Knead Bread Rise?
It depends on the recipe and it can go from twice to probably three times. Remember the longer your bread can ferment, the more complex it tastes and the better texture it will have.
How Can I shape Wet Dough:
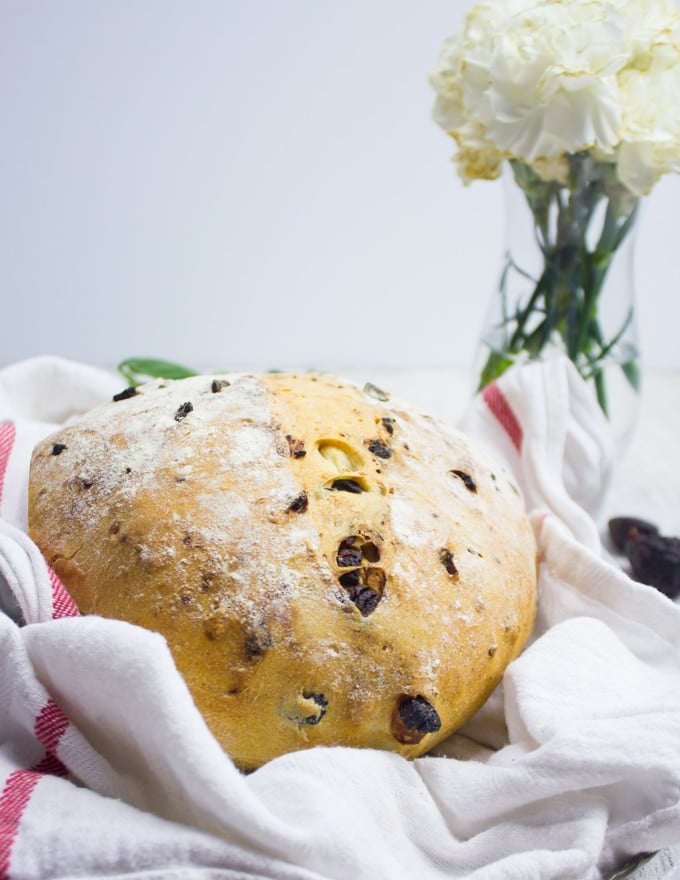
You can watch the video below, it’s another common question. Here’s when you can add some flour to help, and here’s when you may need to slightly round it off into the shape you want. Overall you want to shape this wet dough into a rough oval or circular shape to create this no knead bread shape.
What is a Pre-Ferment:
You’ll notice this recipe has a mini step over yeast, flour and water to be prepared a night before-known as the pre-ferment. You can probably think of this like a sourdough starter (only it contains yeast and it’s only fermenting overnight, not for days). The pre-ferment creates impeccable flavor to your loaf of bread!
HOW TO MAKE BREAD
First of all, you’ll prepare the pre-ferment. A tiny bit of yeast, equal parts of water and flour mixed in a bowl. And you’ll cover this for the next day.
The day of baking, you’ll use a bigger bowl where you’ll add in water, yeast, salt, olive oil and flour. I use a mixture of all purpose flour and whole wheat flour, however this is optional.
Whole wheat flour in my opinion adds a nutty flavor to my bread, so it’s completely optional. If you don’t have whole wheat bread, your bread will taste just as delicious with all purpose flour I assure you!
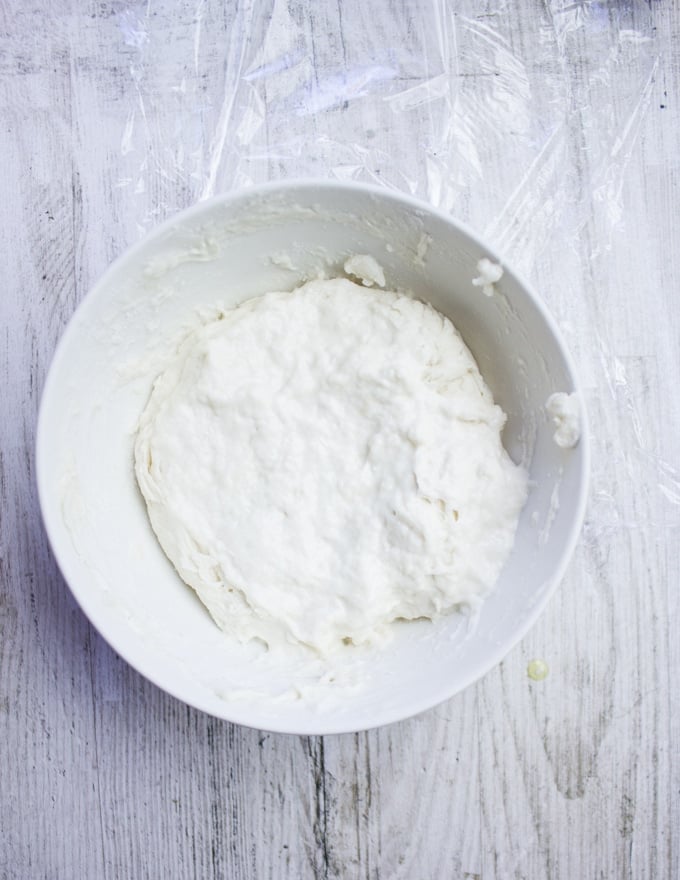
Now you’ll add in your pre-ferment and use a spatula –better off I like using my hands! Simply squish and squash the dough to blend it all into one sticky messy looking dough. Cover it for two hours.
Additions, again they’re optional but totally seriously worth it!
What Can you Add to Bread?
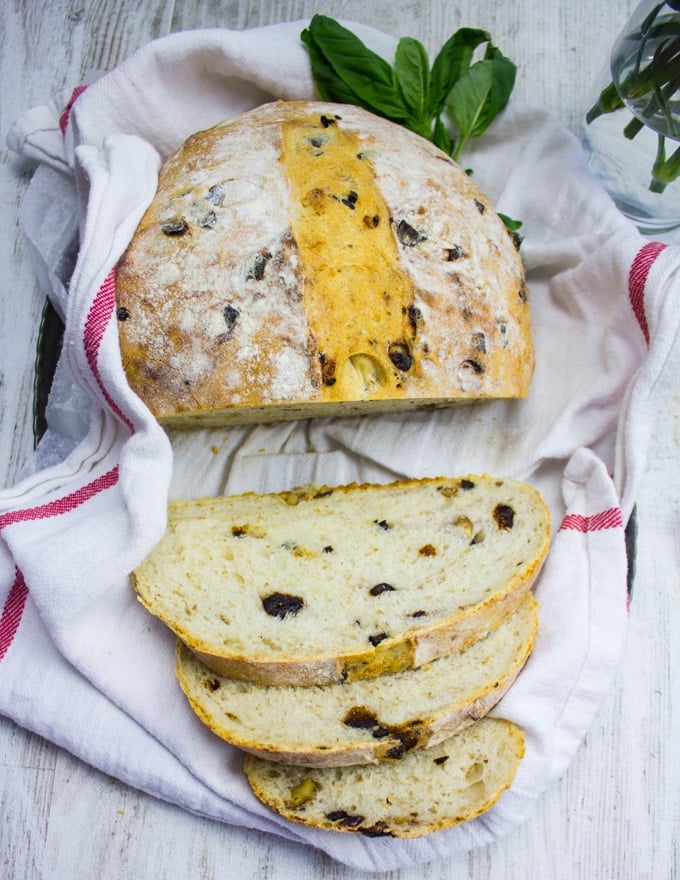
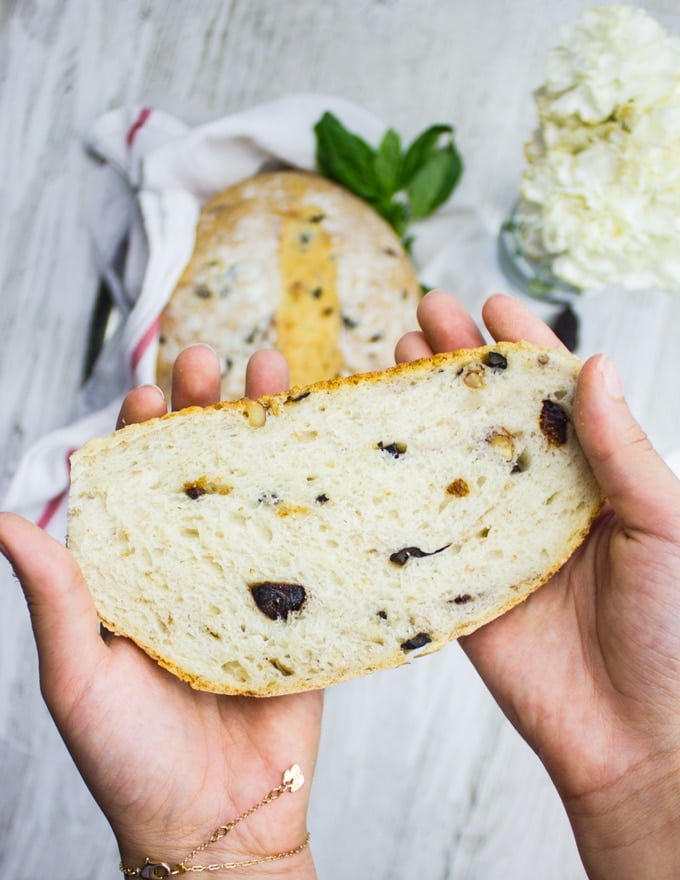
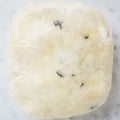
So so many things! Today I picked some chopped olives, chopped walnuts and chopped dried figs. I wish I had fresh herbs like rosemary or thyme, they would be great here! Other additions:
- Fresh Herbs
- Chopped Nuts
- Sun Dried Tomatoes
- Seeds
- Onion flakes
- Cooked Sausage/Meat crumbles
- Olives
- Dried Fruits
- Whole Spice (like caraway, fennel, anise, coriander etc)
- Spice blends or spice
Once you add your chopped additions to the dough, use your hand and fold the dough over just to incorporate the toppings. You may need to flour your hands if the dough is too sticky to handle.
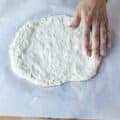
Also flour your surface to be able to shape the dough.You’ll need to basically gather the dough into a rough ball or oval shape. Be careful not to squish the dough, you really just want to gather it as I show in the video.

NO KNEAD BREAD RECIPE TIPS
- It’s best to prepare the pre-ferment a day ahead, however if you’re rushed, you can allow the preferment to sit for as little as two hours.
- The dough is ready when you simply blend all ingredients together including the preferment. It has to be sticky.
- Let the dough rise once everything is added together, covered for another two hours, your dough here should at least double in size.
- Add the toppings you plan to add on over the dough and flour your hands, then just fold the dough over to incorporate the toppings.
- Shaping the dough is best on a floured surface and with minimal effort. Basically you’ll want to gather the dough into a ball or oval.
- When baked and ready, always wait about 30 minutes before slicing the bread to make sure it’s cooled down.
- Store the sliced loaf of bread in your freezer and heat slices in your toaster!
ENJOY!!
BREAD RECIPES AND NO KNEAD RECIPES
No Knead Overnight Pizza Dough
Fool Proof Homemade Dinner Rolls
Cheddar Zucchini Cornbread Recipe
Double Chocolate Date Zucchini Bread
Persimmon Hazelnut Raisin Swirl Loaf
Easy No Knead Bread
No Knead Bread is a fool proof way to start off your bread baking adventure! It's easy, straightforward and plain delicious! This No Knead Bread Recipe is my go to recipe for homemade bread has a video too!
Ingredients
Pre-Ferment
- 1/16 teaspoon yeast active dry or instant
- 1 cup Flour all purpose
- 1 cup water cold
No Knead Dough
- 1 cup water warm (body temperature)
- 1 1/2 teaspoon yeast active dry or instant
- 1 teaspoon salt sea salt or kosher salt
- 1 tablespoon olive oil extra virgin
- 1 cup all purpose flour
- 1 cup whole wheat flour optional -replace it with all purpose flour if unavailable
- 1 Pre-ferment (recipe above)
Flavoring/Topping
- 1/3 cup Olives chopped
- 1/3 cup walnuts chopped
- 1/3 cup figs dried figs, chopped finely
Instructions
-
1.Prepare the Pre-ferment preferably overnight. Mix all ingredients in a bowl using a wooden spoon until just combined. Cover with plastic wrap and let it sit at room temperature.
2. Next morning (8-12 hours later), in a large bowl add the dough ingredients and dump in the pre-ferment from last night.
3. Use a wooden spoon, spatula or your hands to just blend all the ingredients in to one sticky mess. The dough has to be sticky, it will stick to your hands and that's okay. Just make sure the flours, water and pre-ferment are all blended in. The dough shouldn't look perfect or smooth or anything.
4. Cover the dough and let it rise until double-triple in size.
5. Add the toppings to the dough and use your hands to gently fold them in the dough. It doesn't have to be perfect.
6.Flour the surface lightly, dump the dough into the surface and you may need to flour your hands. You don't want the dough to stick to your hands while you shape it.
7. Gather the dough to form a rough ball or oval. Place it on a parchment paper on a baking sheet.
8. Preheat the oven to 425 degrees F.
9. Once the oven is hot, dust the surface of the bread with flour and take a sharp knife to slash the middle of the bread about half an inch deep.
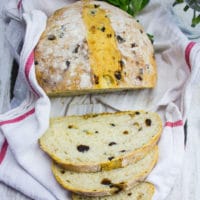
10. Bake the bread for 15 minutes and then drop the oven temperature to 400 degrees F and continue baking the bread for an extra 25-30 minutes until golden. If you tap the bread at the bottom, it will sound hollow like a drum.
11. Cool the bread loaf for 15-30 minutes before slicing.
12. ENJOY!
Recipe Video
Recipe Notes
NO KNEAD BREAD RECIPE TIPS
- It's best to prepare the pre-ferment a day ahead, however if you're rushed, you can allow the preferment to sit for as little as two hours.
- The dough is ready when you simply blend all ingredients together including the preferment. It has to be sticky.
- Let the dough rise once everything is added together, covered for another two hours, your dough here should at least double in size.
- Add the toppings you plan to add on over the dough and flour your hands, then just fold the dough over to incorporate the toppings.
- Shaping the dough is best on a floured surface and with minimal effort. Basically you'll want to gather the dough into a ball or oval.
- When baked and ready, always wait about 30 minutes before slicing the bread to make sure it's cooled down.
- Store the sliced loaf of bread in your freezer and heat slices in your toaster!

Hi Mahy, will you be able to provide measurements in weight rather than volume please, grams rather than cups/ teaspoons?
Thank you!
Wow! I have made lots of no-knead loaves of bread, but have never saw a recipe using a pre-ferment before, other than in sour dough (which I am still trying to conquer getting a starter going!) Question…when you use Half whole wheat flour, is the dough drier and do you need to add more water? Using whole wheat, is the bread heavier or denser than normal? Have you ever used whole wheat “bread” flour? Anyways..I have added this to my bread recipes and will be making it next! Thanks so much for sharing!
Thanks Colleen! Whole wheat does add a ton of flavor, and yes it does dry out the dough a bit, but I don’t see the density being different. The sticky-ness of the dough is key here to eliminate the density.Hope you make it soon! Let me know 🙂
Hi Mahy!
I’ve made your recipe twice and both times the dough was so SO wet. I ended up adding a whole additional cup of flour to get it to where it resembled a dough rather than a paste. I feel like this recipe is super.forgiving because both times the bread turned out tasty but I’m just wondering what/if I’m missing anything!? First time I used volume measurements (1 cup flour, 1.l cup water in preferment, 2 cups flour, 1 cup water in second step) and the next time I measured by weight to double check (120g per cup of flour, 238g per cup of water) but still so wet!!
Would love to hear on your ideas.
I’e been so into bread making recently and this recipe is next on my list!
thanks Haley
This bread looks amazing, and I really like that no kneading is required.
That’s the best part Biana! Delicious bread minus the kneading!! 🙂
No Knead Bread are the best!!! I love the flavors of olive in my bread. Lovely recipe.
I love the idea of a no knead bread. This looks so fantastic. I will have to make it this weekend.
Hope you enjoy it Sisley!
I was looking for a recipe like this, thank you for sharing!
Thanks Shadi!
This is a great loaf of bread! Thanks for the information on pre-fermenting. I haven’t used that technique before.
You’ll love the pre-ferment so much Angela!
I loved the olives in this bread, they added such a burst of flavour! Really easy recipe to follow – thanks!
Thanks so much Bry!! 🙂
Love this no knead bread recipe! We’ve made it last night and it turned out utterly delicious!
Thanks for making it Anna! So glad you liked it!
I love the addition of olives, walnuts, and figs. They make the simple bread even more tasty. 🙂
So true Anita!
This was perfect for a beginner baker. Will definitely be making it again soon!
Thanks for making this Jordan! So glad you’ve enjoyed it too!!
That bread looks absolutely incredible. I love that it requires no kneading too!
Yes Bintu!!
This “no knead” bread looks so good. Homemade bread is impossible to beat and this looks like a very easy way to have it. Thanks!
Absolutely Easy Krissy thank you!
Super easy! Love this recipe, saving this to make again soon 🙂
Woohoo!! Thanks Noelle!