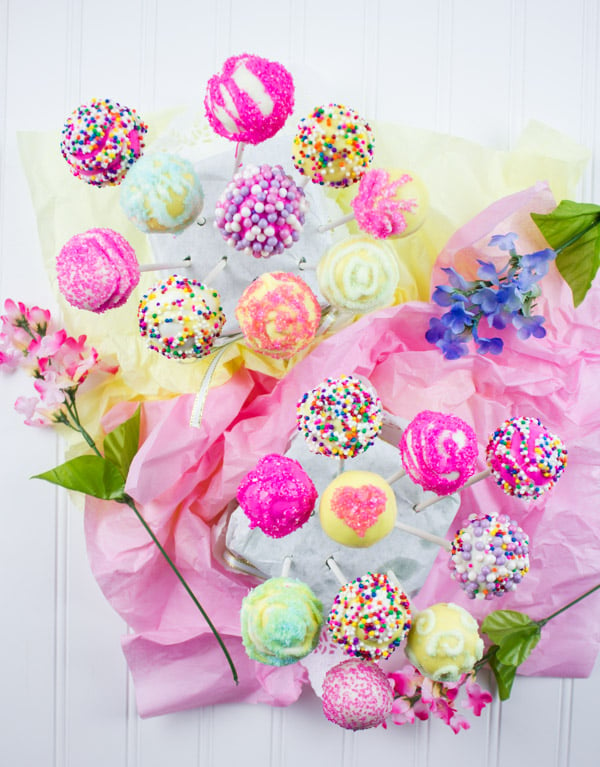
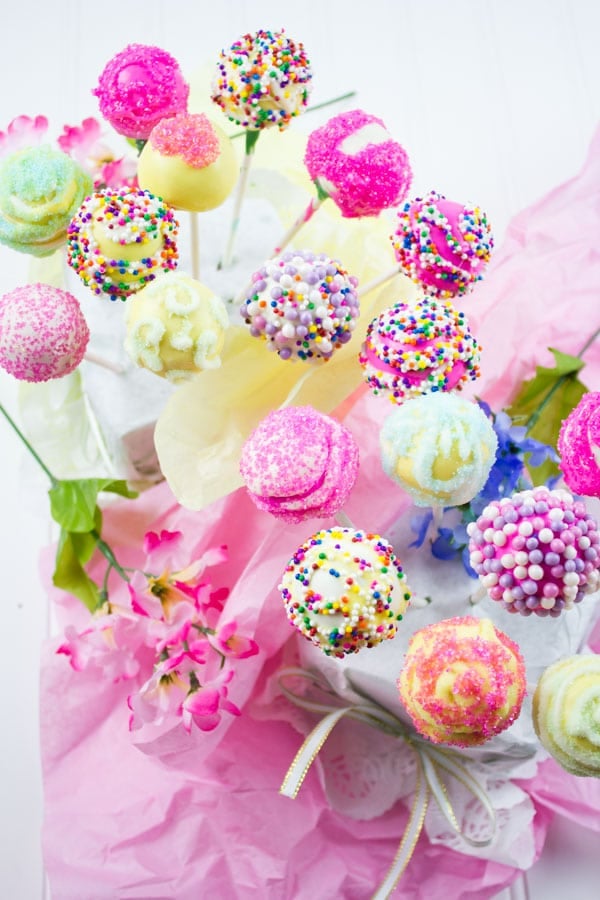
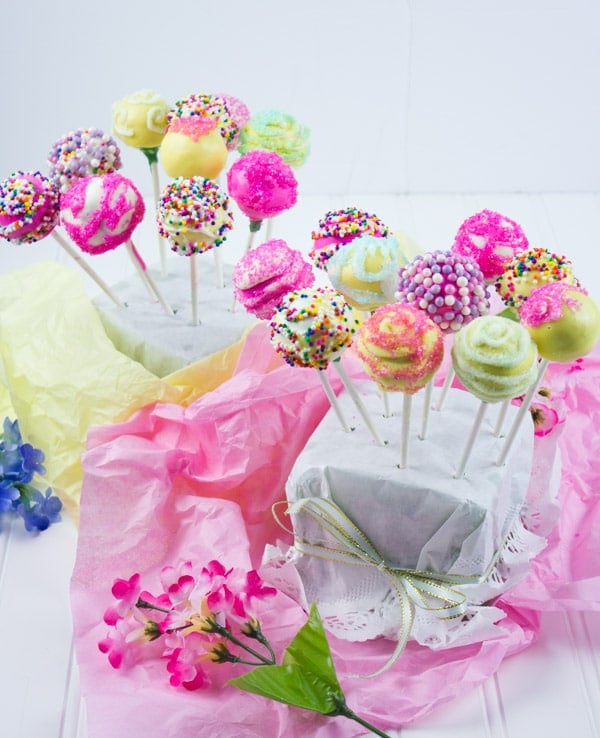
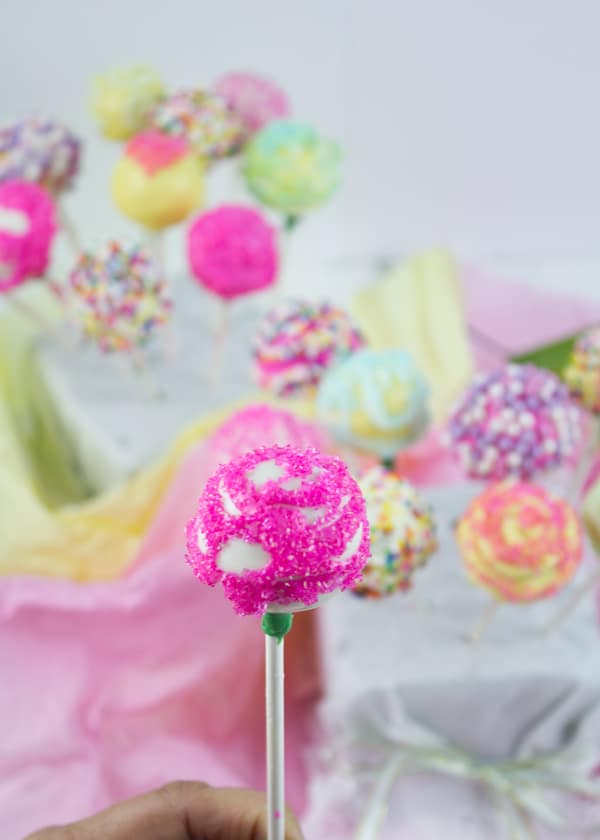
We had a sweet week, like Birthday Girl sweet and Cake Pops sweet 🙂 We made sweet cake pops and decorated them with Easter colors, we went to buy a special gift and then ate quite a bunch of cake pops with friends before bed. It’s definitely something we don’t do everyday, so it felt extra special! And the party dragged till the next morning with cake pops for breakfast and I was thankful they were all gone by then 🙂
We had a Birthday this week, my biggest girl turned eight! When, where, how..I don’t know. All I know is that she’s too excited about growing up lol Every year she picks a theme for her special day, and it varies from crazy adventure to girly spa parties, but one thing she tends to stick to is her love of Easter colors.
Obviously it helps that her Birthday always comes around Easter lol So when she asked for the cake pops this year, I asked her if she wanted a chocolate cake (her favorite) so I can make the cake pops look like a birthday cake and get creative..she said she wants the round cake pop with a yellow cake so she can coat it in light colors. For the record, I really intended this post to be more of a “how to” make perfect cake pops. However, I failed miserably to keep the girls patient enough for me to do this. And I’ll be very honest, this is not the type of recipe you wanna make while being distracted twenty times per minute.
Before I’ll walk you through the recipe, tips and all.. I just wanted to write a few words about my dearest Birthday girl who changed my perspective about life eight years ago. Like most of us (I hope), I wasn’t really prepared for Motherhood and what it could bring. I was naive enough to believe I’ll play and tickle this little cute baby all day and at the end of the night, kiss her goodnight 🙂 I realized that was something anyone else can do, but what I should do is something that ONLY I can do.
I’m the only one that would give up my sleep, my rest, my time, my image, my precious everything, even my tiny precious cup of coffee, my friends, my job, my life..for this little girl. And I would do all that with a big smile on my face, I actually wouldn’t even feel it. I realized I learned so much from my girls, and the funny thing is—I learned different things from each one of them. The Birthday Girl, little Miss D. taught me so much about LOVE 🙂 She was (and still is) the happiest girl in the world, she’s bubbly, adventurous, energetic, loud and never gives up on her fun. She taught me more about patience, acceptance and the silliest ways to have fun lol I love you my precious D. 🙂
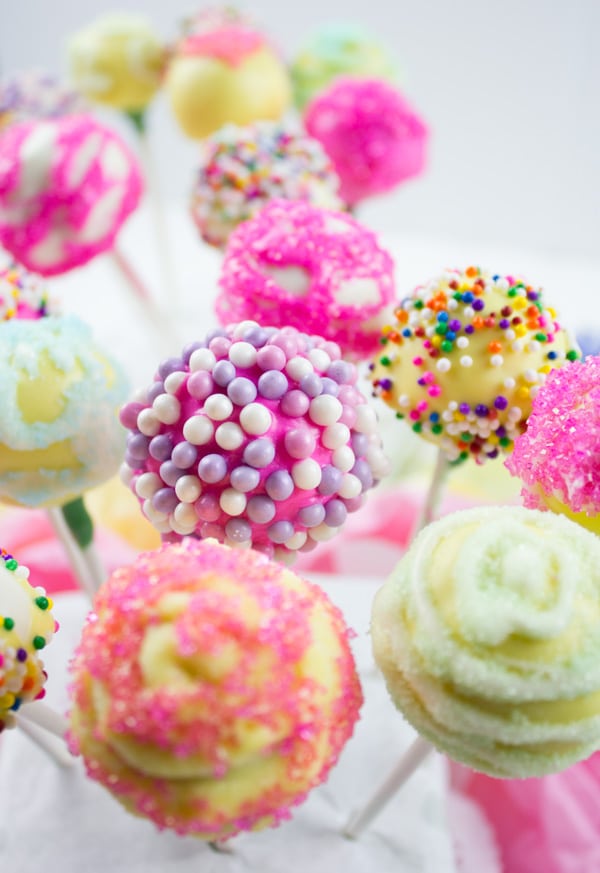
Ok back to our cake pops before things get too emotional here. Again, make sure if you’re doing these for the first time that you have a bit of space around you to work with. There are many shortcuts you can use—like buying ready baked cakes, or using a cake box. I went all the way and baked the cake from scratch—which is not something I wouldn’t strongly urge you to do, but because it was for my Birthday Girl, I wanted to go all the way 🙂 Another thing is to buy those colored candy melts to coat your cake pos in—that I would strongly urge you to do rather than melting white chocolate, tempering it and then coloring it with food coloring. And finally buy yourself a good handful of sprinkles, sugar pearls, colored crystal sugar along with the lollipop sticks. And you’re all set to go.
Tips for getting yourself some perfect cake pops
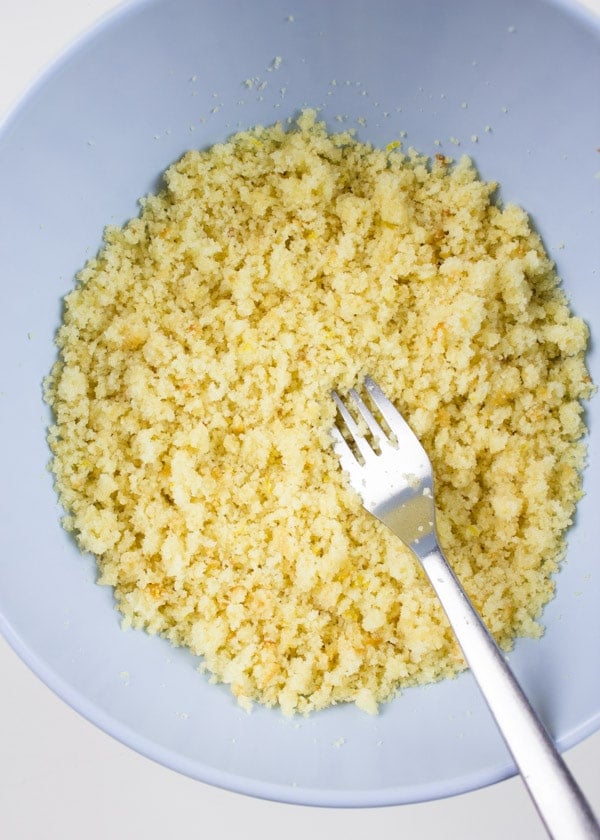
Once your cake is ready (vanilla, white, yellow, lemon, strawberry or chocolate), you’ll need a fork and your hands to help fluff up the cake into crumbs. Here’s the first tip—remove any brownish or golden crusts, tops and sides from your cake because it’ll show in the cake pop. Second tip— you can use a food processor to do that if you’ll be later using a cookie cutter to make certain shapes of the cake pop, otherwise your fork and hands are good enough.
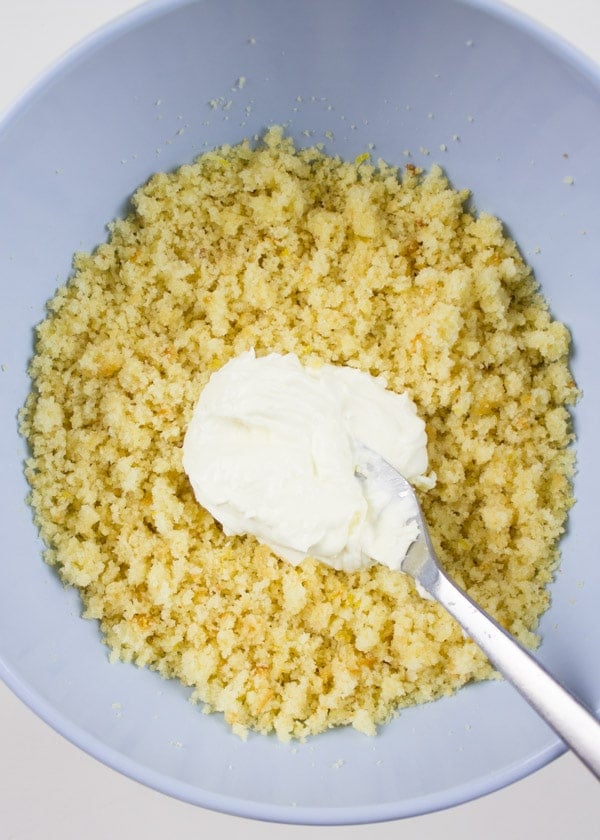
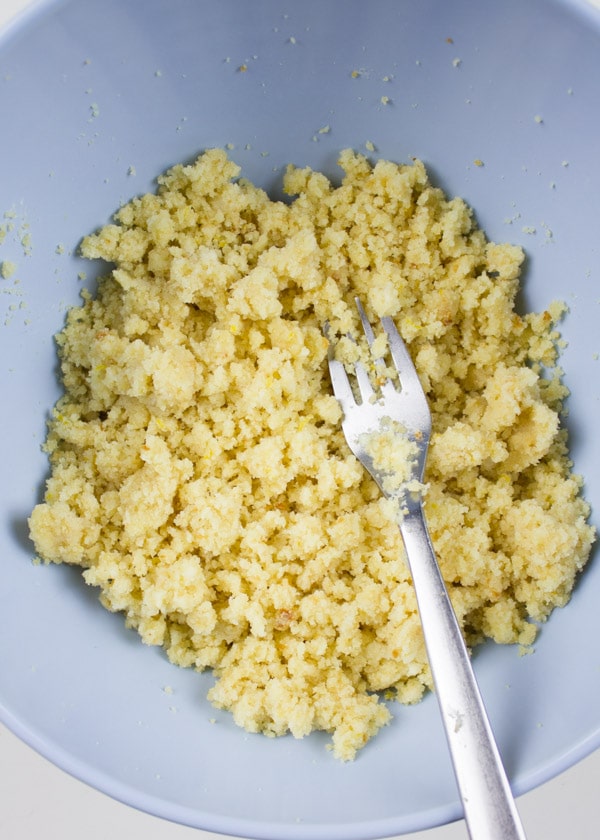
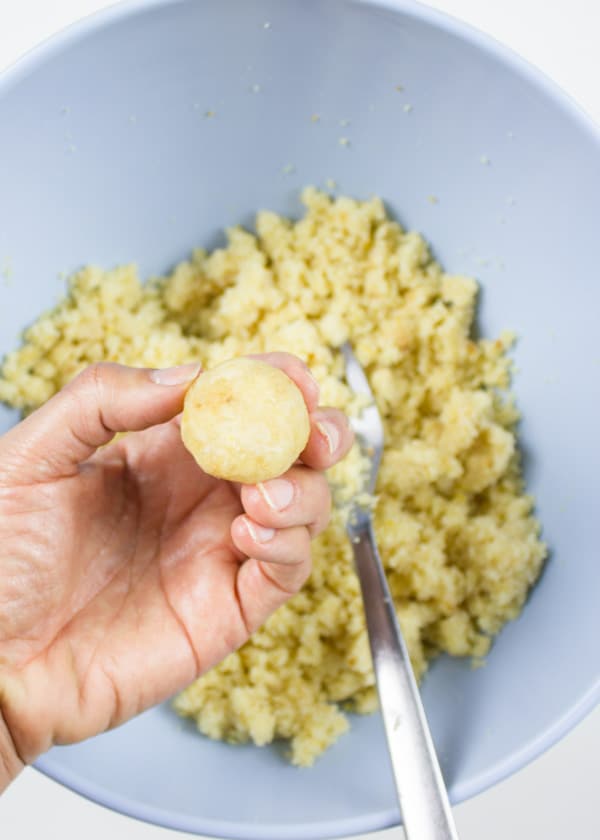
Third tip—mix some good old cream cheese with your cake crumbs to get it nice and moist. Don’t use frosting (ready made or homemade) because you’ll end up with super sugary cake pops, you actually need to soften up the sugar taste from the cake so that when you coat your cake pops, the sugar balances out. Again use the same fork and mix the cake till it’s wet and sticks to each other. Fourth Tip—clump a tablespoon of the cake mix with your hands and try rolling it into a dough, it should be smooth enough and holds it’s shape.
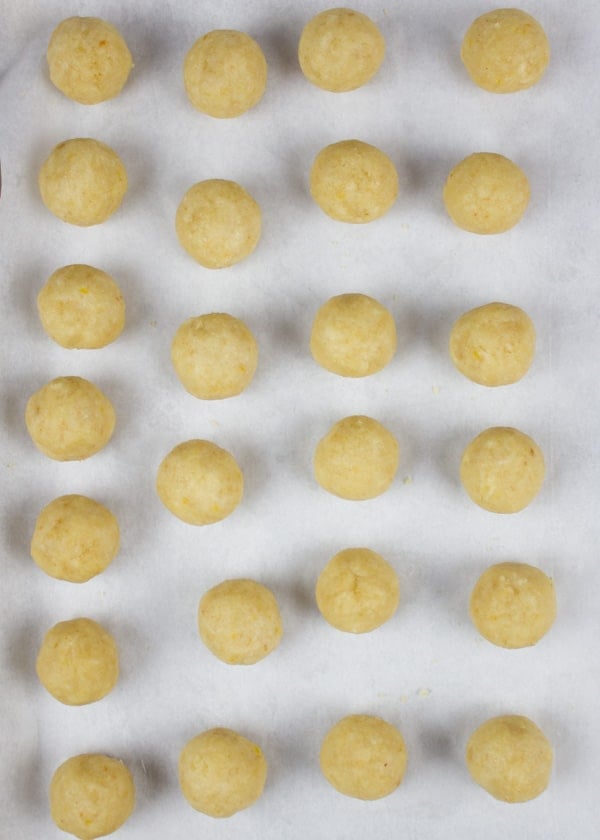
Fifth tip—get a small ice cream scoop, a coffee spoon, a kitchen scale or a regular measuring tablespoon and scoop out even sized balls of the cake mix, first squish the mixture between your hands to smoothen it out and then roll it into a ball. Sixth tip—chill the cake balls for an hour before coating them in the chocolate.
More tips
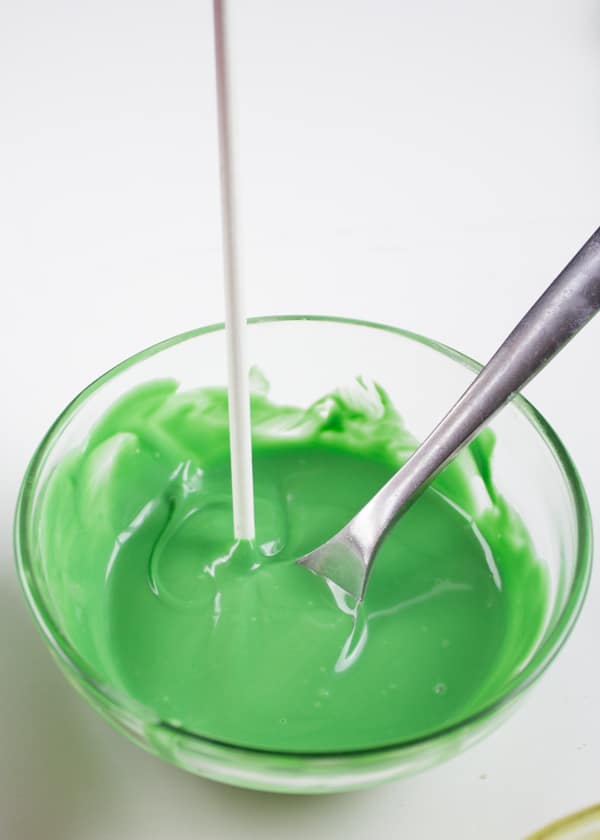
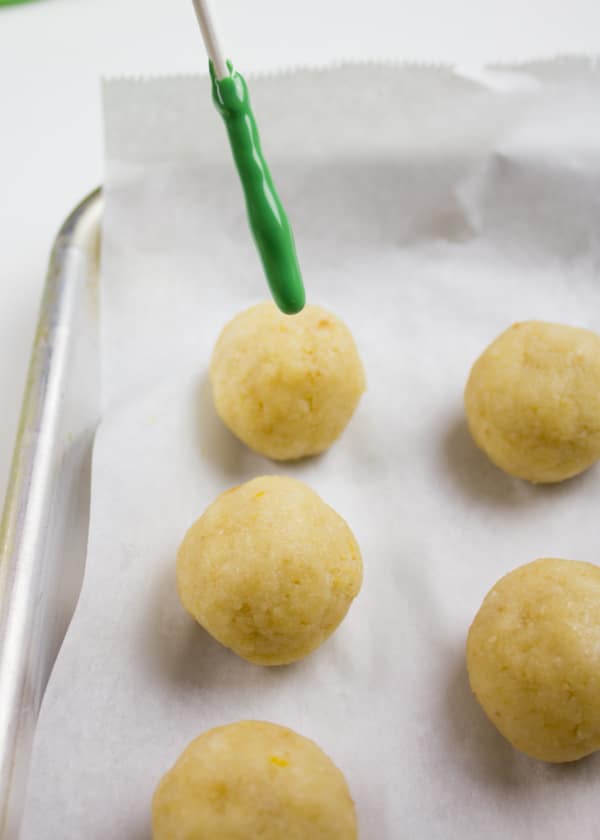
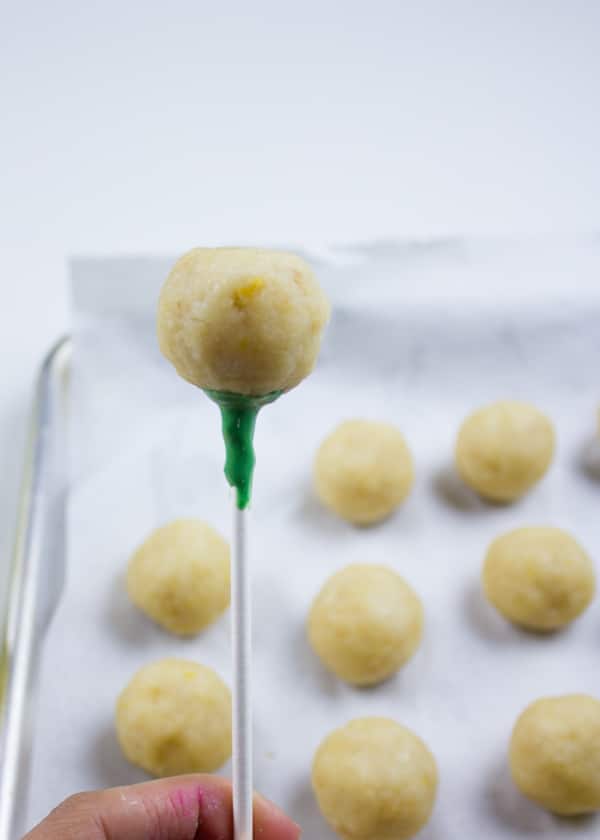
Melt the chocolate either in a microwave or water bath— Seventh Tip: be prepared to be close enough to the microwave or have your water bath still on while you work because the coating will start to harden and you might need to reheat it as you’re working. Dip the lollipop stick about an inch through the melted coating (any color—I picked green to have more colors in my cake pops) and then still the lollipop stick nearly three fourth’s of the way into each cake ball.
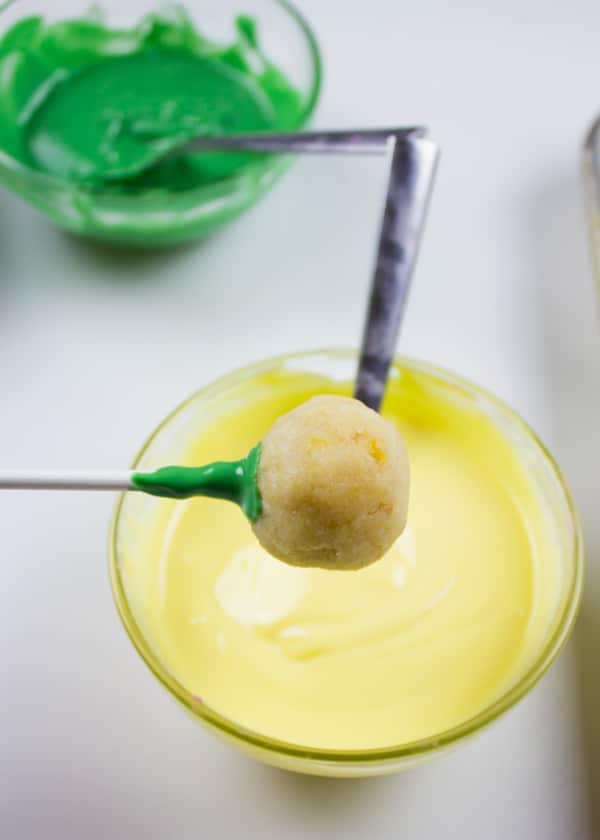
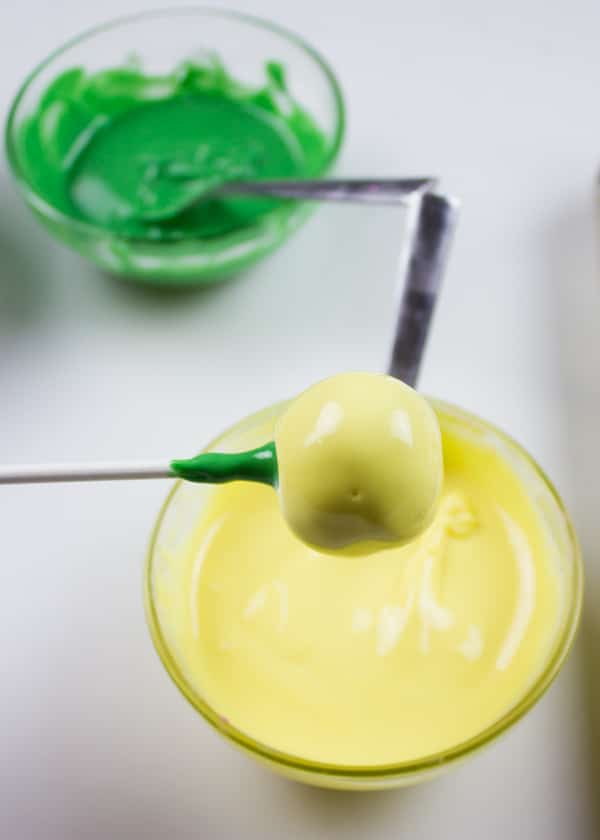
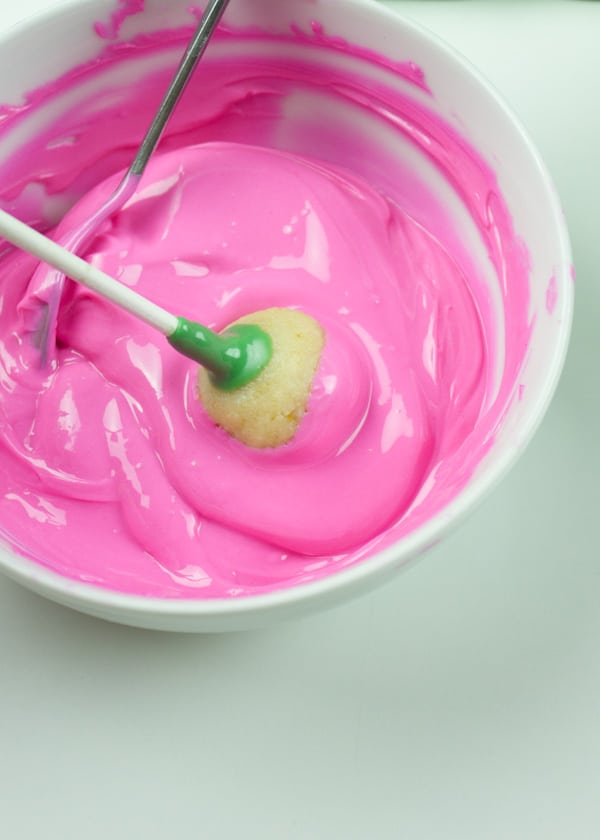
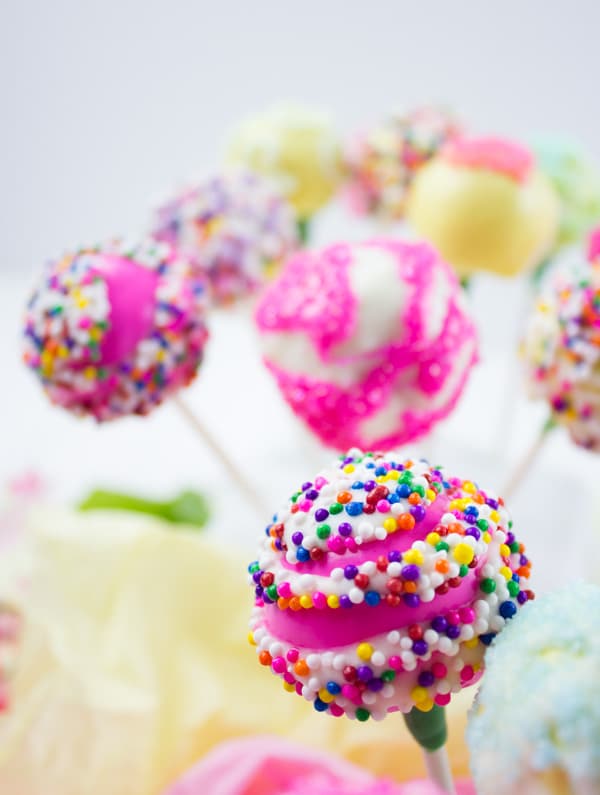
Another tip—At that point the even round shape of the cake ball may’ve changed a bit and now is the time to fix it before coating it in the melted coating. Then pick each cake pop and dip it in the melted coloured coating, swirling it around to coat evenly. Eighth Tip—You need to let any excess coating drip otherwise it’ll drip over on the sides of your stick and ruin the shape of your cake pops. Have your cake pop stand on a styrofoam block, a rubber pad block..anything that can carry the weight of the cake pop. Ninth tip—sprinkle some sugars, sprinkles, sugar pearls..etc on the coating before it sets, otherwise let it set and then decorate it.

Extra tips
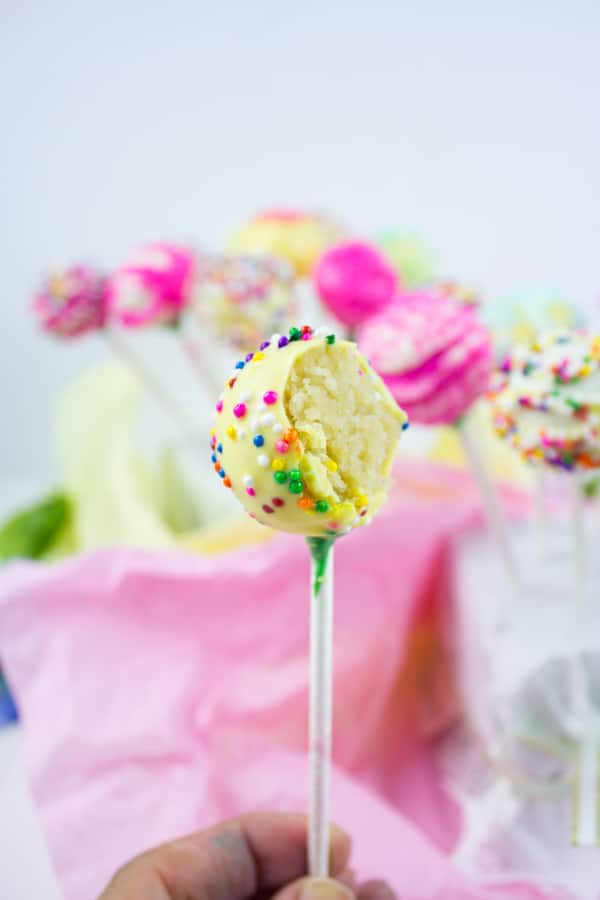
Finally, once the cake pops have dried (5 minutes later), start decorating. Randomly drizzle some coating over the cake pops and then sprinkle with more sprinkles for that crinkled look on the cake pops. And then allow it to set for 5 mins more..and right away dig in and enjoy!! 🙂 The cake pops can stay at room temperature for about a week—I wouldn’t have them last longer than that at my house anyway lol If you prefer to store them in the fridge, you’ll need to cover them well and be sure they don’t get any fridge odors, for that I prefer room temperature storage.
Recipe

Easter Colored Cake Pops For My Birthday Girl
We had a sweet week, like Birthday Girl sweet and Cake Pops sweet 🙂 We made sweet cake pops and decorated them with Easter colors, we went to buy a special gift and then ate quite a bunch of cake pops with friends before bed. It’s definitely something we don’t do everyday, so it felt extra special! And the party dragged till the next morning with cake pops for breakfast and I was thankful they were all gone by then 🙂
Ingredients
- 1 9 inch round cake ( white, lemon, strawberry, chocolate..homemade, store bought or from a box)
- 2/3 cup of warm cream cheese (warmed in the microwave for 40 seconds)
- 3 cups of colored chocolate melts ( or coating), any colors
- 1/2 cup of sprinkles , sugar pearls, colored crystal sugar
- 30 lollipop sticks
- ice cream scoop , tablespoon measurement or kitchen scale
Instructions
-
Please see tip section above for all the detailed tips.
-
Start off by gently slicing the crust, tops and sides of the cake to make sure it’s all the same color and has no golden tone.
-
Break the cake into a large bowl and take a fork, start crumbling the cake into fine crumbs. Use your hands to help.
-
Add the cream cheese and use the fork and your hands again to blend it into the cake until it’s soft and the cake can easily be shaped into a smooth ball.
-
Take an ice cream scoop or scale ( to weigh 1 ounce balls) and pinch the cake mixture with your hands first to smoothen it out before rolling it into an even ball. repeat with the remaining cake.
-
Place the rolled cake balls on a parchment lined baking sheet and chill them in the fridge for 30 minutes while you prepare the coating.
-
Melt the coating, each color separately—either in a microwave safe bowl or using a water bath on your stovetop. It’s best to use deep bowls rather than wide bowls for this task.
-
Take a lollipop stick and dip an in inch of it into a melted coating bowl and then dip the stick with the melted coating tip into a cake ball. Dip the lollipop stick more then half way in the cake ball to make sure it’s secure. Continue with the remaining cake balls.
-
Take each cake pop and dip the cake ball into a coloured coating bowl and gently swirl it around to coat. Then lift the lollipop stick and have it at a 180 degree angle (same level as the edge of the bowl) so the excess coating can drip back to the bowl.
-
Lift the cake pop and secure the bottom tip of the lollipop stick onto a styrofoam block so the coating can dry out.**if you’re coating it with sprinkles and pearl sugars, then sprinkle it right away before the coating sets. Otherwise let the coating set, and then drizzle random lines or shapes or more melted coating over the set cake pop, and sprinkle the sprinkles or sugars over it so it sticks only to the drizzles you made.
-
be as creative as you want to with decorating it and enjoy ! 🙂


Seriously gorgeous cake pops. Those pop of colors are simply wonderful and love all the tips you shared on your post. This one is festive and perfect for Easter.
Thanks Jo!!
These cake pops make any birthday a very happy birthday! I love the showstopping quality of this treat! The decorations are beautiful.
Yes they really were!!
These cake pops are just sooo gorgeous!! I’ve never managed to make them right but with your step-by-step photos I bet even I could pull it off!
Emmeline, yes you can really pull this off!!!
these are so cute for easter! i have never made cake pops before but these look so easy I might just have to try them!
You need to try them Danielle!!
What gorgeous Easter-colored cake pops! Perfect for the spring season and festive get-togethers!
It really is! Thank you!